Check it Out

Headwaters:
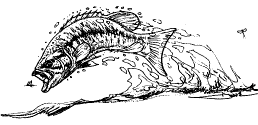
a fish and angling art show
Here is a great selection of Hunting & Fishing magazines.

With 1200 Magazines to choose from you just can't go wrong

Help support this site by supporting our affiliates
All intellectual property and Pictures Copyright� of Robert Morger 1999. No reproductions of any material on this site is permitted without the express permission of the owner. All rights reserved.
The Onelist logo is a copyright of Onelist,Inc Copyright � 1998-1999, ONElist, Inc. All Rights
Reserved.
If you have suggestions or questions please contact rmorger@juno.com
Powered by counter.bloke.com
| A TV Tying Table on a Shoestring Budget Robert Morger You ever find yourself watching television and wishing you could tie a fly or two just to fill in those commercial moments. Or maybe when you have many dozens of caddis flies to go but the show or game is on that you don’t want to miss. So if you are in need of a TV tying surface might I suggest making your own. It won’t cost a lot of money looks nice and is very functional and fits the bill to a tee. Materials needed: Base: manufactured TV tray Tools needed:
Instructions Go to a Wal-Mart or other such store and purchase a wooden TV tray from thier furniture area. Find in that store or in a craft store a couple 3 foot dowels 3/16"x 3’0" diameter another 5/16" x 3’0", drill bits that match the size dowels you acquire if you do not have them already. Also buy some magnetic strip in a roll, any of the stores above should have them, it is adhesive backed and will be used as a hook and gadget holder. You will also need some flat wood stock 2" wide by 1" thick or so, hardwood molding from a hardware store works great for this, some wood glue, sandpaper. These are the basic materials for a tray and shouldn't cost much more than 15.00-20.00 bucks depending on the cost of the TV tray and hardwood you purchase. Build it Cut one section of hardwood the length of the back of the tray, and one equal to a side of the tray minus the width of the back rail. Then cut two more pieces slightly shorter than the others, these will be used as the uprights to hold the rails. Place all pieces on top of the tray exactly how you will attach them and mark the surfaces lightly with a pencil. Now you will need to drill the uprights, tool rails and tabletop to attach dowels. The larger dowels will be used to attach and support the rails and uprights to the tabletop. The smaller dowels will be used to make thread holders. Additionally extra holes will be drilled through the top rails for holding tying tools. It is best to use a drill press to do this operation but if one is not available then just keep the drill as close to a 90 degree angle to all surfaces when drilling. Mark four spots on the back upright at equal distance and drill all the way through the upright. Then mark three places on the side upright and repeat the process. Fit the top rails to the uprights by matching the marks made earlier. Slide a pencil, wire or nail through the holes to mark where to drill for attaching the uprights. Repeat this process on the table top take care to line things up very carefully with your original marks. Drill the holes in the lower sides of the top rail being careful to only drill halfway through the stock. Repeat this on the table surface again being very careful to only drill part way through the wood. Drill holes all the way through the top rails along the edges as you see fit for the tools you will use the most often. When boring these holes drill from the topside of the rail down and make sure you have a scrap piece of wood underneath to minimize splintering. Drill a number of holes, for the thread racks, part way through the top rail. These can place as many of these as you think you will need this is a matter of personal preference. When you have completed drilling these holes sand all the pieces smooth, removing any and all burrs from the wood. Now we must cut the 5/16" dowels into pieces to fit all the holes and put this monstrosity together. Begin by cutting 7 dowels for the upright to tabletop connection, 2-1/4" should be long enough. These should be long enough to go to the bottom of the holes in the table and just slightly less than halfway through the upright. Take a small hand held pencil sharpener and grind off a small amount at the ends of the dowels to make this operation easier. Apply a small amount of quality wood glue into each hole in the tabletop and slide the dowels into each. Lightly coat the top of the dowel with glue, apply a drop into each hole and lightly coat the bottom of the upright. Slide the upright onto the dowels and press tightly into place, attaching a couple c clamps is helpful and makes for a better-finished product. Any glue that seeps out should be cleaned up immediately. Let this dry for a couple hours before attaching the top rail. Attach the top rail using the same procedure. All that is left to complete the tying table is to attach the thread spool dowels, magnetic strips and the bulldog clip if desired. Glue the dowels for the spool racks into place. The length of each dowel is dependant on the size thread spools you use and how many you want on each rack. Again make sure all excess glue is cleaned up after placing the dowels. If you plan on adding a sealant or varnish of some sort do this before attaching the magnetic strip or the bulldog clip. Follow the manufacturer’s recommendations for applying this coating. Well there you have it a simple TV tying table that can be put together on a shoestring budget and comes in very handy for those times you want to roam around while tying. Copyright Robert Morger 2000 |